An AMAZING guest blog post by: Jeni Long & Sallee Clark, the dynamic duo known as #Jenallee
Being Instructional Technologists, we frequently create tutorial PDFs, videos, and help sheets for teachers, administrators, and students. Creating these helpful resources can be time-consuming and tedious. Ugh…😐
And then a wave of ingenious struck us one day…

So we decided to try it out! We saved our screenshots, uploaded them, and then added text. Tada ✨ Our tutorial was created in under 15 min. Not only was it efficient, it also looked nice, was easy to follow, and easy to share.
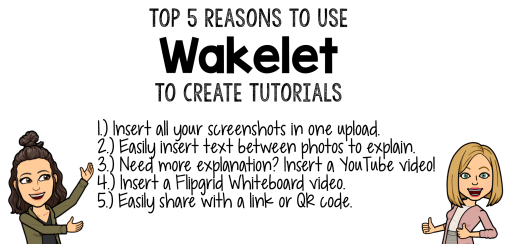
In fact, we have created one for you to show you how to create a tutorial in Wakelet. Check it out below or see our Wakelet collection here!
Step 1
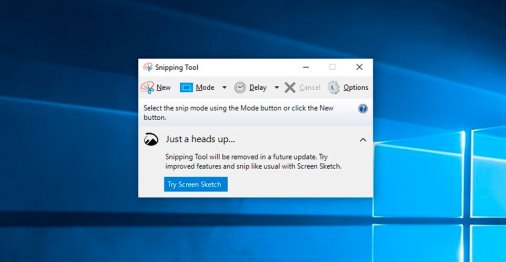
Take screenshots of what you would like to show step by step.
I use a handy tool called: The Snipping Tool. It is part of Windows 10 and it is amazing!
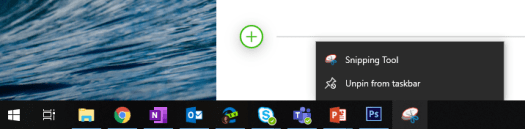
In fact, you will love this tool so much, go ahead and right-click on the icon while it is open and pin to your taskbar! (Pictured with the words unpin- I can’t even think of unpinning, even for a screenshot!)
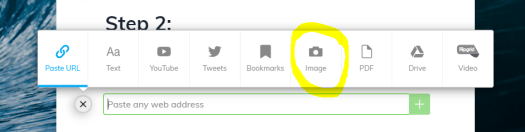
Step 2
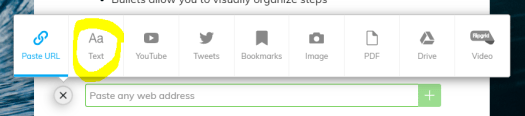
Insert the photos. (Tip: Want to select more than one photo at a time? Hold down the control key while clicking the photos you want to add to your tutorial)
Step 3
Organize your photos. Simply click the up arrows beside your photos to easily move them within the Wakelet.

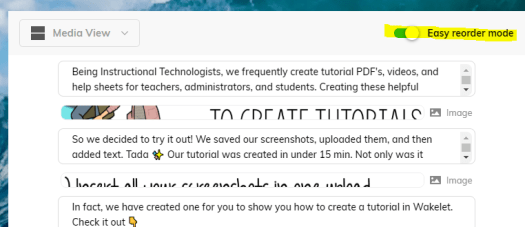
You can also use the ‘Easy reorder mode’ to quickly move images and text around.
Step 4
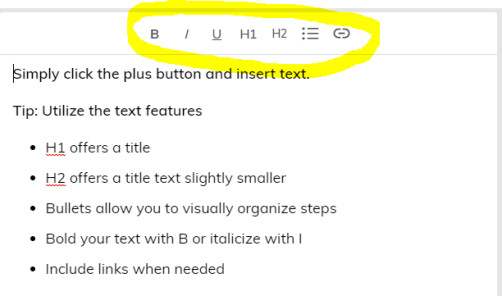
Insert text explaining each step.
Step 5
Share your tutorial.
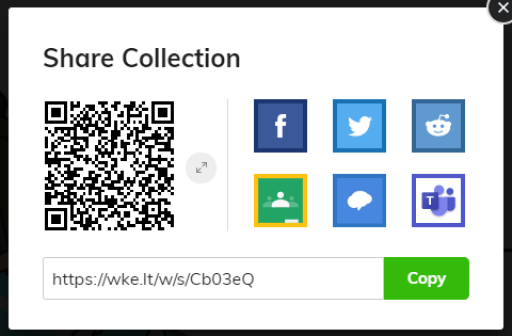
Save your Wakelet as unlisted (only people with the link can see it) or as public. Then click Share.

Now you can share your tutorial in 8 different ways!
- QR code
- Link
- Google Classroom
- Remind
- And our favorite, 💜 Microsoft Teams
Follow us on Twitter: @Jenallee1
Check out our Wakelet profile!
And take a look at our YouTube channel!